Bunner looks better
Version 0.5
The focus in this version is a graphical tweak, namely the grass tile. In previous versions, terrain tiles were a single block of colour, so grass was just a featureless green square. I wanted to add add at least some detail, and put in place a handy structure for developing tile graphics in future.
I’m intending the overall style of the game to be very ‘pixel-ly’, but I wanted to vary that a bit, so the plan for now is to have ‘multi-resolution blocky sprites’. What I mean by that is that sprites will mainly be ‘very’ blocky, but will also contain some less-blocky detail.
With that in mind, my first attempt at meaningful tile graphics uses a ‘layered’ approach:
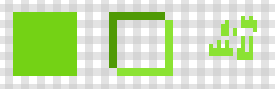
In this example, the first layer is a 1x1 green square. This is the ‘base layer’ — it defines the core colour scheme for the rest of the tile, and it’s the one layer that will guarantee to show, regardless of zoom level (more on that later).
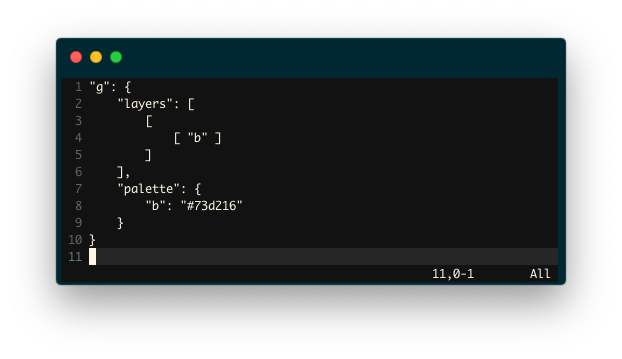
This single layer is simply stored in a 1x1 array, with a value indexing into the palette map:
The remaining two layers specify greater detail, with each layer rendered on top of those that have gone before it. The middle layer is an 8x8, and it’s a classic shaded edge used to convey a sense of depth. These tiles should look inset, as if they were actually tiles on a real game board (that’s the idea, anyway!).
The final layer is an approximation of blades of grass. It’s still a fairly low-res amount of data — 16x16 — but I’m doing my best here to create an effect that looks vaguely like grass, even from a distance.
Here’s the json data for the first two layers:

Note that each layer is a square with a length that’s a power of 2. This is planned intentionally: it makes scaling that much easier. In theory, I can support lengths greater than 16, but that’s my current limit since I’m displaying tiles at 32x32 by default, and single pixels don’t produce a pixel-ly result!
With three layers in place, it’s now an easy task to render this tile at various sizes:
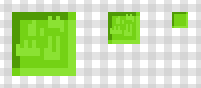
In the image above, the middle tile is the actual default size currently, whilst tiles either side demonstrate bigger and smaller sizes — these might be displayed, for example, when zooming in/out. Notice how the smallest view doesn’t show the final layer at all, because its 16x16 size, at half zoom, would result in individual pixels being drawn in a 32x32 square. That’s what I want to avoid — I want a blocky, pixel style.
Putting some tiles together gives us a reasonable effect, for now, as can be seen most clearly in the new level 4 in this version.
In the next step, I’ll look at more variations (so repeated blocks don't look so weird), or other terrains (e.g. earth), or possibly a new object to interact with (one that actually has a purpose!).